Week 2: How secure is hiding your SSID?
Exposing APs with hidden SSID
Terms
AP = Access Point
SSID = Service Set IDentifier
Blue Team
The Defence
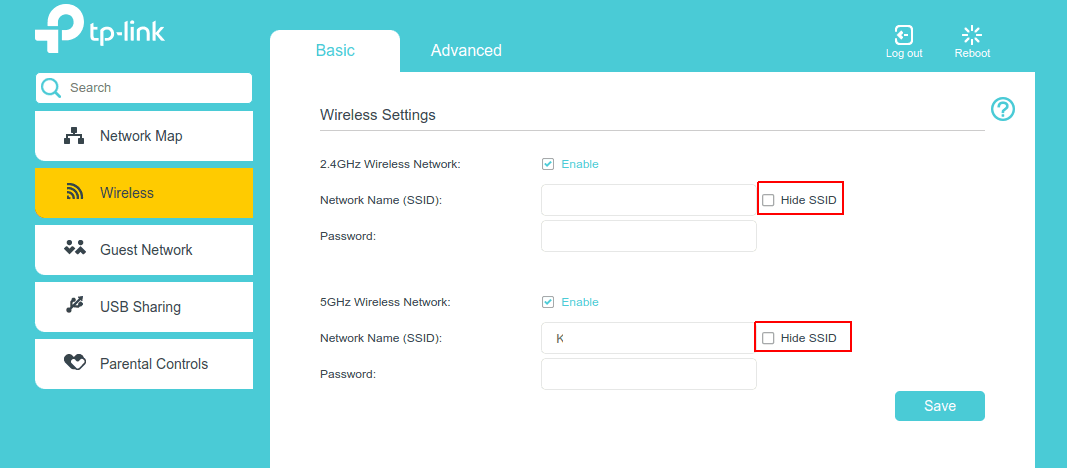
Hiding your SSID is an option that is provided on the modem’s admin console.

By toggling the option on, the user’s Wi-Fi network will not display on devices when scanning for wireless networks to connect.
A typical scenario would be when you invite a friend to your place and they would like to connect to your Wi-Fi to watch Netflix on their laptop.
Normally, you would expect the network to show up in the list of available wireless networks on their computer. By employing this method, it would no longer show up.
Your friend would need to manually add the network name alongside the password in order to connect.
This type of safeguard is commonly known as security through obscurity.
The network is safe ff the attacker doesn’t know of its existence.
The Setup
- We have set up an access point (AP, a fancy name for a modem) that provides a wireless network with the Network Name: “Catch Me If You Can!”.
- The Hide SSID toggle is switched on.
Blue team has made their move. What will Red team do?
Red Team
The Red team aims to discover the network’s SSID despite it being hidden.
The Gear
The equipment we need is described in detail in my Week 1 Post.
I will do a quick recap of the set up:
- Raspberry Pi is set up with Kali Linux
- Wireless Adapter is attached and in operation
- (optional) SSH into Raspberry Pi from Macbook terminal
The Knowledge
Access points send out a variety of messages.
The ones we care about for this attack are:
- Beacon Frames
- Probe Request
- Probe Response
Beacon Frames
Beacon Frames are sent out for other computers to detect them.
Even if you hide the SSID, the modem still needs to send out its beacon frame for connection with legitimate computers.
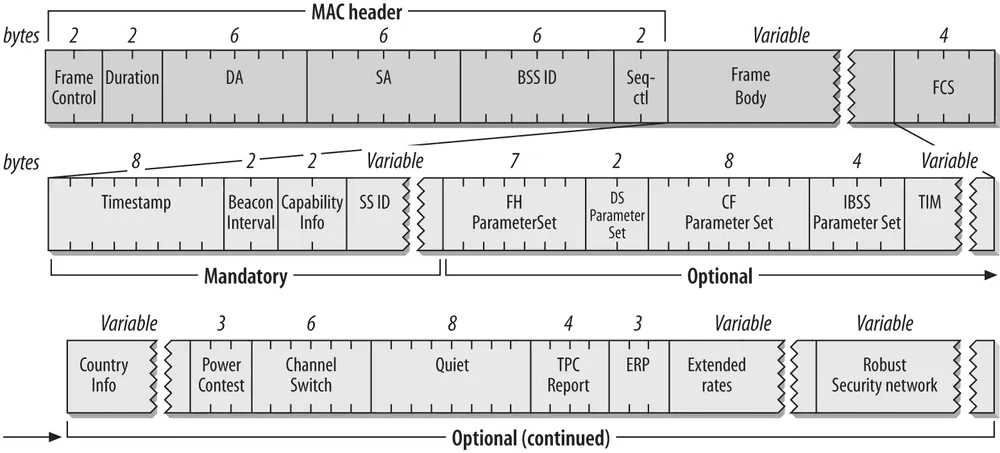
The beacon frame data contains a whole bunch of information - much of it is optional.
However, the part that IS required is the initial section labelled the MAC header.
It contains key information for devices like laptops, phones and IOT devices connect to the router.
The key info that we are looking for is the BSS ID.

What You Should Know About Beacon Frame Format?
Probe Requests
Probe requests are messages sent from a device to scan the area for WLAN networks.
A typical event is when you open your phone’s Wi-Fi settings to select a network to connect to.
From your perspective, the networks populate the screen gradually. The reason behind this is because your phone is sending out these Probe Requests to the networks it knows about to see if they respond.
Upon receiving a request for the network, an AP would send out a Probe Response with data about itself so that the devices are able to connect.
WLAN Probe Request frame | Probe Response frame
The Attack
We should now be armed with the knowledge of the previous section.
For our attack, this means that we would wait for a user’s phone will try to connect with the networks it knows about (including the hidden one we are trying to discover)
We should see the name of the hidden SSID show up in the Probe Response packet when it’s responding to the Probe Request.
Once our set up is ready we will start the attack.
sudo airmon-ng start wlan1
sudo airodump-ng wlan1mon
These lines of code achieve these outcomes:
- Enable monitor mode on wireless interfaces
sudo airmon-ng start wlan1 - Capture raw 802.11 frames
sudo airodump-ng wlan1mon
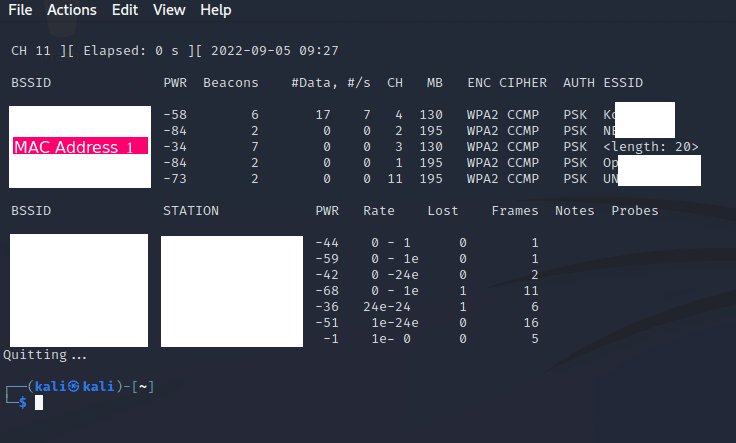
We can see the output below:

In the ESSID column, we see a list of networks that we can connect to. This corresponds to the items on the Wireless Networks list when you open the settings in your laptop or phone.
There is a funny one named <length: 20>
This is a hidden network. I’ve stopped the capture here to make it easy for the screenshot but there are a few more in the area.
The length refers to how long the name of the network is which will be helpful to use as a sanity check but we won’t use it for serious verification.
Our best bet is leveraging off the BSSID which, by convention, is the MAC address of the Access Point.
We will use Wireshark to identify the SSID in plain text.
Wireshark will capture all the packets in the area and post them onto the screen.
If we filter the source address to match the BSSID we are looking to reveal from earlier, we can keep an eye out for a Probe Response to be emitted.
Normally, an attack like this would take a few days while a monitor is waiting for a response.
Here, we sped up the process by using a phone to connect to the network. This gives us a first hand look at the response’s contents.
We have found the SSID name!
Catch Me If You Can!
